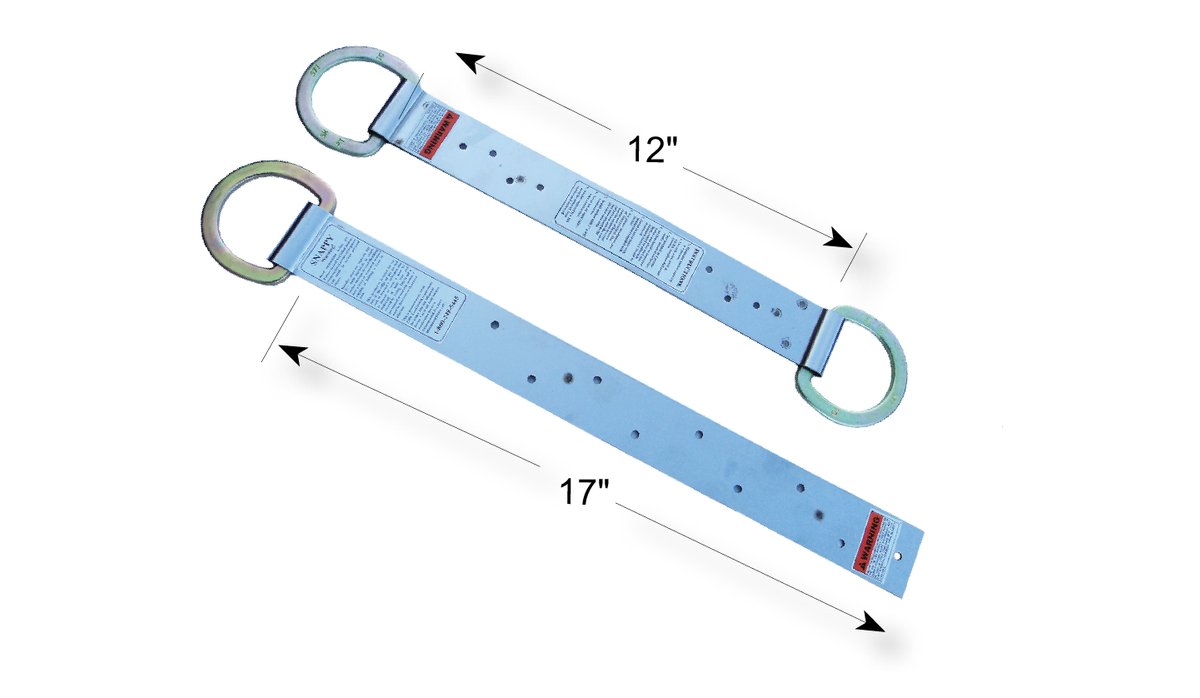
Looking to safely secure yourself while working on a roof? The Double D Anchor is one of the most reliable fall protection solutions out there—and it’s easy to install when done right. In this guide, we’ll walk you through how to properly install a Double D Roof Anchor for maximum safety and code compliance.
✅ TL;DR: To correctly install a Double D Anchor, find a structural rafter, remove a section of shingles, use the right lag bolts, and install under the ridge cap. Always follow OSHA safety standards.
🛡️ What Is a Double D Roof Anchor?
A Double D anchor is a permanent or temporary fall arrest anchor that installs over the roof ridge, creating two D-rings—one for each side of the roof. This allows for maximum mobility and fall protection coverage on both slopes.
🧠 Why it’s popular:
-
Works with composition or wood shake roofs
-
Dual-sided tie-off points
-
Meets ANSI & OSHA standards when installed correctly
-
Great for steep-pitch roof work
🧰 Tools and Materials You’ll Need
-
Double D Anchor
-
12 wood screws or 3" lag bolts (as specified by the manufacturer)
-
Cordless drill or impact driver
-
Stud finder or hammer to locate rafters
-
Roofing nails
-
Roofing sealant or caulk
-
Safety gear: harness, lanyard, gloves, safety glasses
🔧 Step-by-Step Installation InstructionsStep 1: Choose the Anchor Location
-
Locate a roof ridge with solid rafters on both sides.
-
Use a stud finder or tap the roof to identify the framing.
-
Avoid areas with venting, skylights, or ridge caps with cutouts.
Step 2: Remove Shingles at the Ridge
-
Pull back or remove 2–3 shingles on each side of the ridge to expose the decking.
-
This ensures the anchor sits flush and fasteners go directly into the wood structure.
🛠️ Pro Tip: Use a flat bar to lift shingles without tearing them.
Step 3: Pre-Drill and Secure the Anchor
-
Align the Double D anchor over the ridge so that both legs sit flat on the decking.
-
Pre-drill holes using the anchor’s template or guide holes.
-
Drive in lag bolts or wood screws (depending on spec) into each hole.
-
Usually 6 per side for a total of 12 fasteners.
-
Step 4: Seal and Reinstall Shingles
-
Apply roofing sealant over the screw heads.
-
Replace or cut shingles to fit over the anchor base.
-
Use roofing nails to tack shingles back down.
-
Optionally install a ridge cap over the anchor if using a permanent installation.
Step 5: Clip In Your Safety Harness
-
Attach your lanyard or lifeline to either D-ring.
-
Perform a tug test to make sure the anchor is secure.
-
Proceed with your roofing work—safely.
🛑 Safety Tips and Compliance
-
Always follow OSHA 1926.502 standards for fall protection.
-
Use anchors rated for 5,000 lbs or more.
-
Never share a single anchor point unless rated for multiple users.
-
Replace your anchor if it has experienced a fall or impact event.
📄 [Read Our Guide: OSHA Requirements for Roof Fall Protection]
🧲 Permanent vs Temporary Installation
Installation TypeProsConsPermanentIdeal for future work or multi-phase jobsMay require flashing or cap customizationTemporaryQuick setup, reusableNeeds to be removed and patched post-job
🏷️ Featured Products for Installation
📈 Why Installing It Right Matters
Improper anchor installation is one of the leading causes of preventable falls in residential roofing. A correct install:
-
Prevents accidents
-
Passes inspections
-
Gives you and your crew confidence on every job
Need help finding the right anchor or fall protection gear?
Contact us or explore our Fall Protection Collection.

